Easy Weight Loss for Lazy Gurls

So the freshman 15 hit me HARD, except I’m a junior and it was 30 pounds. The junior 30? I made a new thing.

After avoiding the scale for months, I stepped on it and saw that I was 165 pounds and I knew that I had to change. I was overweight for the first time in my life and it took a huge toll on my self esteem. When I was a teenager I actually struggled with being underweight for a long time, and gaining weight was a struggle. I was on the opposite end of the spectrum then, and years of not caring about what I ate and never exercising finally caught up to me. I realized I wasn’t immune to gaining weight.

So obviously I’m terribly lazy. I don’t like cooking, exercising, or basically any vegetables or healthy foods. I like drinking on the weekends like every other college student, and it seemed like every fitness personality on the internet preached to eat a completely clean diet, exercise for hours everyday, and to barely drink any alcohol.

I do not think that this is sustainable for the average person. In order to lose weight and to keep it off, you need to have a routine that you can continue for your entire life. For me, that is moderation and knowing exactly what I am eating.

Step One:

I did a lot of research and the first thing I realized I needed to know was how many calories my body burned a day. There are online calculators and formulas that you can google to see how many calories your body burns personally, but currently I am 5’7 and 157 pounds with a relatively inactive lifestyle, so my body burns around 1,800 calories a day. That is also how many calories that I need to eat to maintain my weight.

So since I need to eat 1,800 calories to maintain my weight, I need to eat at a calorie deficit in order to lose weight. A lot of people eat at a 500 calorie deficit, so they would eat 1,300 calories a day. But I don’t mind losing weight a little more slowly, so I aim for 1,400 calories a day and if I’m under that it’s fine.

With a calorie deficit of 500 calories a day, you will lose one pound a week since it takes a 3,500 calorie deficit to lose one pound.

Step Two:

I think it is essential to track your calories. In order to lose weight you need to know what you are putting into your body and how many calories it has. A ton of people underestimate how many calories they eat a day and then get confused when they gain weight or can’t lose weight. It sounds like a ton of work to track everything that you put into your mouth, but it really isn’t.

There are free apps to do this such as MyFitnessPal and LoseIt that make it simple.

If you cook a lot of food at home you can buy a food scale and then weigh everything out and calculate the calories like that. MyFitnessPal and LoseIt have a search feature that has basically every chain restaurant, so if you want to eat a McDouble you type it in and the calories pop up for you.

Seeing everything that you eat in the day laid out in front of you with all of your calories is really game changing and makes losing weight way easier. It literally takes a few seconds after you eat and you’re done.

Step Three:

I tried for the first week of my diet to eat completely healthy and I was miserable. Like I said before, I realized that eating completely healthily was NOT sustainable for me and once I was done with my diet I would just gain all of the weight back that I lost.

I realized that the only thing that matters is calories. As long as your body burns more calories than you consume, you lose weight.

So I started eating whatever I wanted again, but in moderation and I recorded everything that I ate into LoseIt. Now instead of eating an entire pizza I eat a few slices, if I want fast food I get some chicken nuggets and not a huge meal, and if I want to drink I make sure I leave enough calories in my day so I am able to do so.

If I want to eat something that is 1,000 calories I just don’t eat it or I split it in half. It’s seriously that simple and it is working for me.

It also makes it much, MUCH easier if you cut out liquid calories and just stick to water. I cut out soda because I found that it was just calories that I could be eating. Also, if you drink water before your meals or when you are slightly hungry it drastically cuts your appetite. Water is great, drink a lot of it.

Optional Step Four:

Alright so I know that being lazy means that I shouldn’t be exercising, but exercising just makes dieting so much easier. It does not have to be running or anything crazy.

When I first started dieting I was DEAD set against exercising, I was set on losing all of my weight without exercising. But then I thought…. hey if I exercise then I can eat more food. I made that connection and that was all of the motivation that I needed.

You don’t have to exercise, but it helps and you can fit boneless wings into your diet more easily sooo you probably should.

I am the most out of shape person on the planet and I can’t run a mile without wheezing and wanting to die. I bought a super cheap gym membership for $20 a month and I do easy exercises like walking on the treadmill at an incline and riding on the stationary bike. Doing this I typically burn around 400-500 calories a workout, which is a ton of food. You don’t have to run, you don’t have to do anything crazy, you just have to walk.


I watch Netflix when I exercise too because otherwise I would just get bored and music didn’t stop the boredom for me. Netflix keeps you entertained and makes you stop focusing on how much you would rather be in your bed. It made me from only staying on the treadmill for 15 minutes to staying on for an hour. Three episodes of Parks and Recreation makes time fly.

Also:

Lean Cuisines are amazing if you are too lazy to cook and just need a fast, low calorie meal. Their mac and cheese is my life force.

That’s basically all that I do! You don’t have to buy anything unless you feel like getting a gym membership, but that’s not required and you could just cut calories and lose weight like that! I hope that this helped at least one person get motivated to lose weight! It’s not as scary and intimidating as it seems.

Thanks for reading!

Easy Two Ingredient DIY Lip Scrub! Say Goodbye to Chapped Lips

I struggle IMMENSELY with chapped lips. They get dry so easily, and then I have an awful habit of biting my lips and that makes the situation way worse.

When I feel like my lips are doing especially terrible, I put together this two ingredient lip scrub and my chapped lips are gone instantly. They go from being rough, peeling, and ugly to perfectly smooth. It is the easiest thing in the whole world, and you most likely already have what you need in your kitchen.

IMG_1438
Photo/Kaity Kline

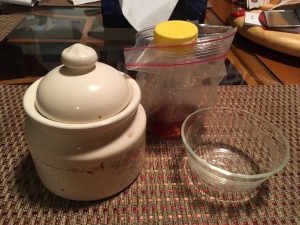
All you need is honey, sugar, and a container to mix them together in. It can be any type of honey, and any type of sugar. It does not matter, just use what you have and it will turn out fine.

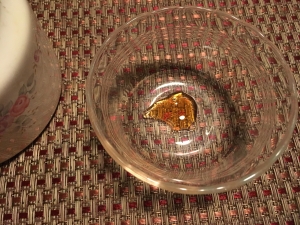
I don’t use any specific measurements either, I just eyeball it. There should be more honey in the container than sugar.

IMG_1439
Honey Photo/Kaity Kline
IMG_1440
Sugar on the honey Photo/Kaity Kline

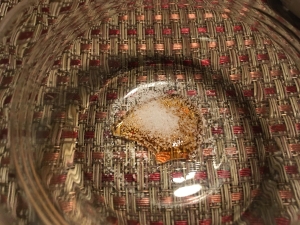
I just used a really small amount of honey since that is the amount that I had left and it is a good amount for a single use. I sprinkled enough sugar to cover the top of the honey. Then I just used my finger to mix it together and put it directly onto my lips.

Then I spend about 30 seconds just rubbing my lips together and then I lick it off. It tastes good and it’s better than washing it off. Then I usually go in a second time and repeat the process. Then my lips are smooth and look great!

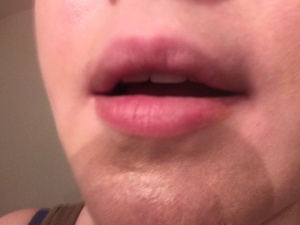
This is my before and after!

chapped
Before Photo/Kaity Kline
after
After! Photo/Kaity Kline

And that’s all that I do! I hope that this was helpful to somebody that has chapped lips that seem like they won’t go away. It only takes a few minutes, so even somebody as lazy as me can do it, and it makes a huge difference!

N.J. Hairdresser Kendall Johnson Talks About Her Views on Hairdressing and Gives Easy Hair Advice

I sat down with Kendall Johnson, a 20-year-old hairdresser located in central New Jersey to get her views on her profession. She shared with me her favorite and least favorite part of hairdressing, gave tips to beginners, and told me what she thinks people neglect the most in their hair care routine.

Beauty Blogger Spotlight: Nicole Lynn/Glamwar.ous

Nicole Lynn is a 34-year-old mother, dermatology nurse, and beauty enthusiast that began her WordPress blog, glamwar.ous last fall. Nicole was born in Dallas, Texas and moved to Minnesota in 1991. She currently lives in Excelsior, Minnesota, a suburb of Minneapolis. She has worked as a dermatology nurse for the past seven years in a primarily medical dermatology practice, and enjoys her job as well as interacting with people of all ages. Nicole also has a 15-year-old son who is a freshman in high school. In addition to blogging, she also loves summertime, boating, and wide-brim hats.

Nicole started blogging during her recovery period after having C5-6 cervical artificial disc replacement surgery, which left her out of work for a month. She always wanted to start blogging, and finally had the time to begin during her recovery period- making blogging her focus while recovering.

Her favorite part about beauty blogging is that she loves sharing her opinion with others as well as the numerous connections she has made within the beauty community. She values the moral support and encouragement she’s received. She enjoys reading other beauty blogs over beauty magazines.

Nicole comes up with ideas on what to post randomly, and has upcoming posts in progress such as Target and Sephora hauls, and is planning on writing a piece on sun protection, which is something she is very passionate about. She does a fair number of sponsored, non-biased product reviews that take a long time to plan and edit. She is planning on limiting the amount of sponsored reviews that she does to focus on letting her creativity shine.

The most challenging part of blogging to Nicole is posting on a regular schedule, and is still trying to establish a consistent blogging routine while working full time and driving her son around to his various activities. She says it’s all about time management and setting a routine for yourself.

Her advice to anybody first starting out blogging is “do it because you love it and want to share that passion. That should be your number one reason. The perks of receiving free products and making money from affiliate links are great, but don’t allow it to influence your opinions that you share with others. More and more people are placing their trust in bloggers and social influencers. Be cognizant of that.”

Nicole believes that sun protection is the number one thing that everyone of all ages should make their top priority, and is also the top thing that people overlook during their skincare routines. She knows many dermatologists that encourage those in their late 20s and 30s to use Retin-A (tretinoin) nightly. She says it has been used and studied for decades and has known effectiveness against wrinkles through the stimulation of underlying collagen.

She also advises to keep your skin well hydrated with a good moisturizer and to drink water to help with your overall skin health. She believes that sunscreen should be used as a daily part of people’s skincare routines, since even intermittent sun while driving and walking to your car adds up.

I asked Nicole what two of her holy grail skincare products were, and the first was Dermalogica Oil Control Lotion, which she says is very lightweight, absorbs oil and also controls excess sebum production. The second is Elta UV Clear Broadspectrum SPF 46 Facial Sunscreen, which she says is the best facial sunscreen she’s used. It’s oil-free, non-comedogenic, zinc-oxide based, paraben free and wears perfectly under makeup.

I also asked Nicole what one of her favorite beauty hacks was, and she said that when her skin starts to feel dry from extreme cold, she mixes her tretinoin cream with her nighttime moisturizer to combat the drying effect of the tretinoin.

Check out Nicole’s blog by clicking here!

Easy Long-Lasting Concert Makeup

Makeup used to be an absolute NIGHTMARE for me any time that I wanted it to stay in place for a long time. Going to concerts or parties where I need my makeup to last for hours when I’m hot, sweaty, and being active was not a fun time for my face. I would think my makeup would last a long time, then it ended up melting off my face and turning into a drowned raccoon look really fast. But now I know how to make my makeup last forever, and it’s easy!

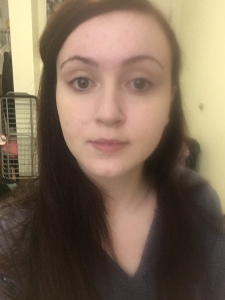
Before:

IMG_1193
Before makeup (Photo/Kaity Kline)

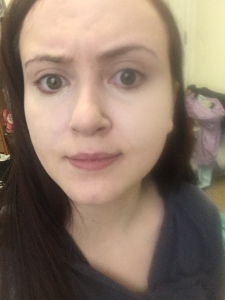
After:

makeup
After makeup (Photo/Kaity Kline)
meeee
After makeup (Photo/Kaity Kline)
eyeshadow
Close up of eyes (Photo/Kaity Kline)
lipstick
Close up of lips (Photo/Kaity Kline)
  1. To start I spray Urban Decay All Nighter Setting Spray all over my face. Then I go in all over my face with Benefit Porefessional. Seems over the top, but I need to be over the top to make my makeup really stay.
  2. Next, I take Urban Decay All Nighter foundation and dot it all over my face, then blend it in with a damp beauty blender.
  3. I take my Maybelline Age Rewind concealer and apply it in an upside-down triangle underneath my eyes, on my chin, and in a strip up the bridge of my nose. I conceal blemishes with Maybelline Master Conceal. I blend them both together, since I let the Age Rewind sit and set for a little bit before blending it.
  4. Next, I take the same damp beauty blender and dip it into my Laura Mercier Loose Setting Powder and cake it on under my eyes to bake. I also bake my chin, up my nose, and under my cheekbones to reaaaallly set it in. I leave the bake on until I’m finished with my eye makeup, so it doesn’t have a set time for me.
  5. For my eyebrows, I just fill in the sparse bits with the Anastasia Beverly Hills Brow Definer.
  6. Next, I prime my eyelids with Too Faced Shadow Insurance Anti-Crease Eye Shadow Primer. I honestly just use this because it is what I currently have, and I prefer the Urban Decay eyeshadow primer.
  7. For eyeshadow, I used the Anastasia Modern Renaissance palette.
  • Tempera all over the lid, in the inner corner, and up to the brow bone with a regular fluffy brush.
  • With the same fluffy brush, I blended Burnt Orange into my crease as a transition shade.
  • Underneath the crease color I packed in Warm Taupe on the lid.
  • With a tiny blending brush I put Red Ochre in the crease
  • With the same tiny blending brush I added Primavera onto the inner third of the eye.
  • With a flat brush I applied Warm Taupe underneath the eye.
  • With the same flat brush I applied Cyprus Umber as an eyeliner8. I used Too Faced Better Than Sex Mascara on both the top and bottom lashes.

8. Too Faced Better Than Sex Mascara on top and bottom lashes.

      9. I’m weird and I contour after nearly everything else. I used the Kat Von D Shade and Light and used the middle shade all over the outside of my face to give it some dimension. Then I used a small blending brush and contoured my nose up to my brow bone.

     10. With Shade and Light I took the lightest highlight shade and brushed it under my eyes, on my cheekbones, down my nose, and on my chin.

     11. I took the Tarte Amazonian Clay 12-Hour Blush in the shade Paaarty and popped it lightly on my cheeks.

    12. Jeffree Star Liquid Lipstick in Androgyny all over lips.

    13. Then I sprayed all over my face with Urban Decay All Nighter Setting Spray again! That’s it!

This is my typical go to makeup when I’m going out to a concert or having a night out in general!I hope this helped anybody having trouble making their makeup last a long time. 

How to Easily Clean up Your Eyebrows

When I was in the sixth grade I hated my thick eyebrows. It was back when the trend of super thin eyebrows was in style, and everybody in my grade made me feel ugly because my eyebrows were thick. I plucked my eyebrows out, plucking out of the middle because I was 12 and didn’t know what I was doing. It took them a while to grow back. But luckily, over the years I learned how to groom my eyebrows properly. So here is an easy way to clean up your eyebrows and make them look nice!

All you need is a pair of small scissors, a spoolie, tweezers, and a magnifying mirror. They can be from anywhere, I grabbed mine randomly from CVS. The set I specifically have is the Revlon Brow Set. Don’t use big scissors, as they aren’t precise enough to trim eyebrows and you could cut yourself or cut off your entire eyebrow. Don’t do this with makeup on because it will likely cause you to break out around your eyebrows.

IMG_1151
Before plucking my eyebrows. (Photo/Kaity Kline)

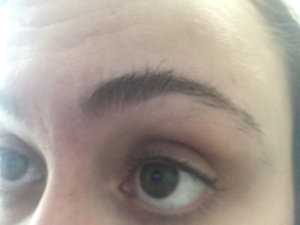
This is a picture of what my eyebrows look like after a few weeks of not doing anything to them. As you can see, I have a lot of long hairs that I need to trim and I need to pluck underneath my brows desperately.

Trimming my eyebrows is very easy. First I take the spoolie and brush up my eyebrows. I cut the hairs that stick up over my eyebrows, that’s it. Just remember to not cut off the entire hair, just the part that is sticking up over your eyebrow. Then I repeat that step until hairs don’t stick up past my eyebrows when I brush them up. This helps immensely and cleans everything up.

IMG_1156
What your eyebrows should look like when you brush them up, cut off those little hairs sticking up. (Photo/Kaity Kline)
IMG_1158
Cut the hairs sticking up. (Photo/Kaity Kline)

After I trim my eyebrows I get to plucking. Once again, you can use any tweezers you want. More precise ones help, but it’s not essential. I get my eyebrows done every two months, so I can clearly see where the hairs don’t belong since random, sparse hairs appear around the shape I want. Even if you don’t want to get your eyebrows done, I would suggest to get them done at least once so you have a shape you can easily maintain, but once again this is not necessary.

I use my magnifying mirror and get very close up, it’s necessary to see everything you are doing when you are plucking your eyebrows. I got mine for around eleven dollars from Walmart, so it doesn’t have to be one of those fancy, expensive mirrors. I pluck all of the tiny stray hairs underneath my eyebrows, the middle, and the stray hairs around the tail end of the eyebrow. Then when I’m done with that I just brush them through again with the spoolie and make sure I trimmed and plucked everything, and then I’m done.

Don’t pluck from above your eyebrow because that can easily mess up the shape. Unless you’re super confident, I’d suggest buying an eyebrow razor from the drugstore. They’re super cheap, tiny razors and you can shave the top of your eyebrows if there are stray hairs so you don’t have to risk messing up the shape. It makes your eyebrows crisp and defined. You can also use the eyebrow razors instead of plucking, but I prefer to just pluck everywhere else.

And then you’re done! Super easy, and your eyebrows will look great no matter what! 

IMG_1169
After trimming and plucking, very improved. Eyebrows are cousins and not twins, so it doesn’t matter if they don’t look exactly the same. (Photo/Kaity Kline)

Beauty Blogger Spotlight: Q&A With Anna Bankester of Bee Beauty

bee-beauty

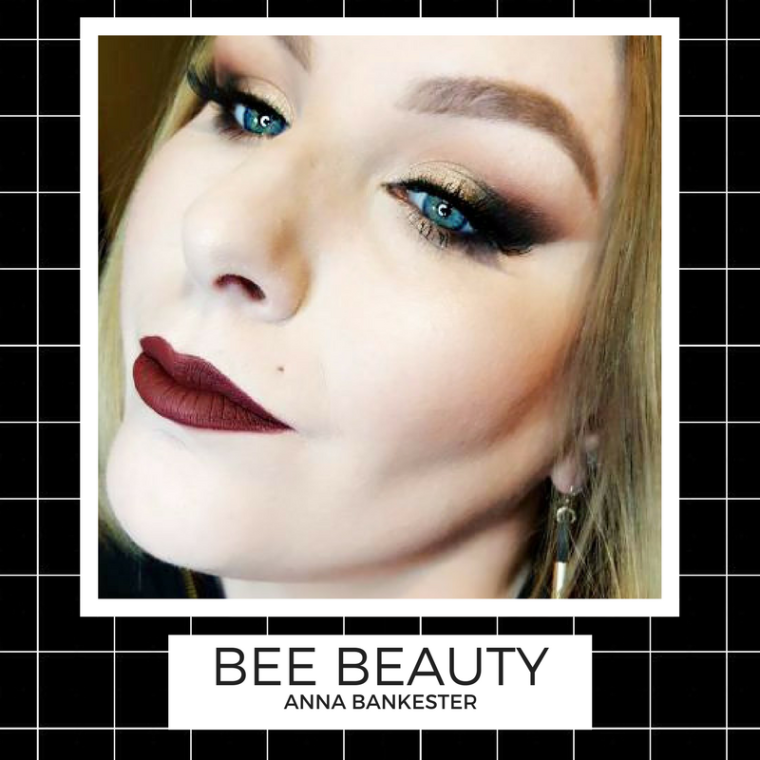
Anna Bankester is a 30-year-old beauty blogger and freelance makeup artist from Alexandria, Louisiana who runs the blog Bee Beauty. Her blog currently has 4,540 followers and she posts three times a week on Mondays, Wednesdays, and Fridays. She covers a wide range of topics that include makeup tutorials, reviews, skincare, style, interior design, lifestyle, and fitness. She spoke to me about how she got into makeup, why she started her blog, and some of her favorite makeup products.


What first got you into makeup and how old were you when you started wearing it? 

I think like most of us, it was my mom who got me into makeup. I would sit and watch her get ready every day and copy everything she would do when I was really little. She would give me her older stuff that she’d hit pan on to play with. When I was 13 I started wearing makeup to school, and haven’t stopped since. I would study how people in magazines did makeup and try to imitate it on myself.

What’s your favorite thing about being a freelance makeup artist?

I love faces and everything that makes them unique. Getting to enhance the features that make them different is a joy to me. I love it.  I love making someone feel great about themselves and embrace what they think of as imperfections, and show them that that’s what makes them beautiful. And it’s fun, I get to paint faces, be creative, and play in makeup.

Why did you decide to make a beauty blog?

Because my husband was sick of hearing me talk about makeup, LOL! No, really I started Bee Beauty as an outlet for my passion, and share my makeup knowledge. I love talking about new things I’ve learned, and about products. And again, it’s fun. I get to do all the things I enjoy with blogging, from makeup to graphic design. I can talk about more than just makeup if I want.

The blog has also given me something to focus on and keep me busy. It helps with my anxiety.

How do you come up with ideas on what to post?

If I get a new product, I want to review it and go into all the details from packaging to performance.

For my tutorials and makeup looks, those ideas come from a variety of places. Sometimes it’s the expected holiday themed look, but I try to put a new spin on it that fits my style which is usually a bit more macabre. Most of the makeup look ideas come from music, the colors I see in my head when I hear it, how the song makes me feel. It’s just like with any other artistic expression. I put a lot of thought into it.

Of course, other posts are showing techniques for makeup, some are about interior design, and some are just for fun.

Do you feel like your life has changed at all since creating your blog? If so, in what ways?  

Yes, I feel a bit more fulfilled. Like I am doing something for a reason as trivial as makeup may seem. Blogging gives me a sense of accomplishment. I was in kind of a mental rut before I started Bee Beauty and was having really bad anxiety issues like I said, it gave me focus. Bee Beauty has also allowed me to have some many new opportunities, from guess blogging and writing, trying new products, to helping out my freelance MUA career. I earn a little more income here and there to support my habit of buying makeup.

What are three beauty products you wouldn’t be able to live without?

Eyebrow pencil, mascara, and concealer.

What’s one of your favorite drugstore makeup products? 

I love NYX’s Micro Brow Pencil. It’s a dead on dupe for the Anastasia Beverly Hills Brow Wiz and it will up your brow game like nothing else.

What’s one of your favorite makeup or beauty hacks? 

I don’t know if Baking is a hack, but I love it. Especially around the chin where I crease like crazy and below the bottom lip to clean up the lip shape and give it a lift. I have a droopy sad mouth so this helps me out.

Testing the Silisponge to Apply Foundation and Concealer

I never wanted a Silisponge. When the trend made its rounds on social media late last year I was not interested. I thought it was gimmicky, something that I would never use. How could this silicone chicken cutlet blend in my foundation and not make me look like a streaky, unblended mess? How could this give me a full enough coverage to cover my hyper-pigmentation? Not interested.Then my boyfriend’s mom gave me a Sillisponge. So I decided to try it and I was surprised.

img_0996
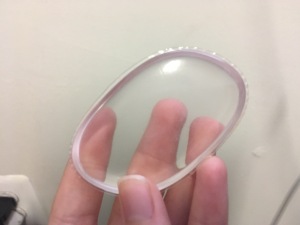
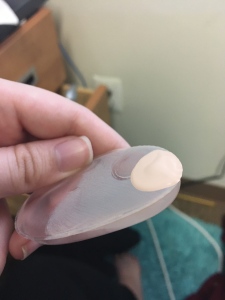
The Silisponge!

The Silisponge is a makeup applicator from the beauty company Molly Cosmetics. It’s currently $9.90 on their official website, and you can order a bundle of two for $14.90. The main appeal of the Silisponge is that it does not absorb product, so you waste less product and save money. It also washes easily with a little soap and water, which is appealing since washing makeup brushes or a Beauty Blender is the worst. It’s small, silicone, and easy to hold. I did lose it once though because it is clear, so keep it in a safe place. 

The website claims “the amount of liquid of cream products needed is about half the amount compared to directly using brush or sponge.” They also claim that spreading the product takes getting used to, but final blending can always be finished with a brush or sponge. Since I’m testing the Silisponge I am only going to be using that, and no other additional brushes.

img_0995
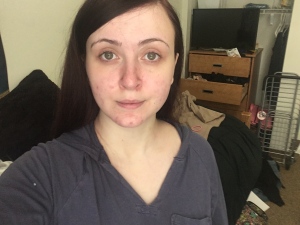
Pre makeup

This is what my skin looks like without any makeup. As you can see, I have areas of hyper-pigmentation and redness. It’s usually difficult to cover everything completely, so we are going to test if the Silisponge will cover all of my problem areas while also giving a good, even application. I usually use about one and a half pumps of my Urban Decay All Nighter foundation, but today I began with one. It ended up being enough to cover my face and neck. This is usually enough to cover all of my redness when it is applied with a Beauty Blender or a brush.

img_1001
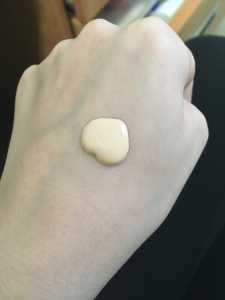
One pump of Urban Decay All Nighter foundation

First, I primed with Benefit POREfessional face primer around my nose and then I jumped into the foundation.

On the Molly Cosmetics website it tells you to take a little amount of product and to go in circular motions to spread the product, then to tap it into the skin.

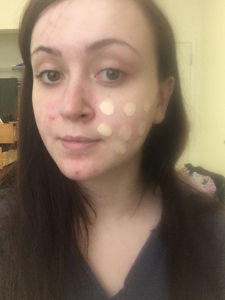
I began with dots on the left side of my face, spread it in circular motions, and then tapped it in.

img_1003
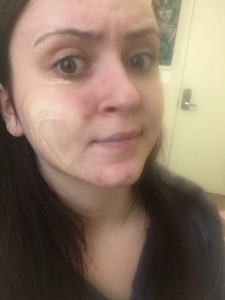
Foundation dotted onto my face
img_1004
Spread onto the face
img_1005
After

It does not blend at all really when you are going in circular motions, it just spreads the product around. It does blend in after you tap it into your skin, but it does take a while to blend completely and it takes some pretty vigorous tapping. You’re basically slapping yourself in the face with this thing. It did cover my redness well, so the Silisponge does not diminish the coverage of the foundation. 

On the other side of my face I dabbed the Silisponge directly into the product. It does not absorb anything, and the product sits on top of the sponge.

img_1007
Sponge after being dipped into foundation
img_1008
After being spread onto my face
img_1010
After

I think that with this method it is a little more difficult to blend everything out. Definitely a lot more face slapping than the dotting method. When you initially rub it onto your face it just seems like you are moving the foundation over your face and not actually blending it, but it does get a little better once you start tapping it in. Coverage took a hit on this side, and you can definitely see redness through the foundation. I’d stick with dotting it on my face and blending it out over dipping the sponge directly into the product. 

I would not recommend this for under-eye concealer at all. I used my Revlon Instant Age Rewind Concealer and tried it with the concealer and it just did not blend correctly and spread the product way further than it had to go. Blending around all the curves and crevices of the eye is difficult, and I ended up just going in with my fingers because what should have taken be 20 seconds took me a few minutes and still did not look good.

img_1015
It’s a no from the under-eye

The Silisponge did work on my face concealer well and quickly. I dotted by Maybelline Master Conceal on areas of hyper-pigmentation for additional coverage and after some slight slapping for 20 seconds everything was blended well.

img_1021
After concealer!

Personally, I’m sticking with the beauty blender and brushes. I think that it depends if the Silisponge is worth it. If you value not having to heavily wash a makeup applicator over the application time, then you should get the Silisponge. It would be great for people with acne prone skin that are not so good with washing their brushes. You save time washing brushes, which is great. But if you don’t mind washing your makeup brushes and value doing your makeup quickly, I’d stick to a brush or a beauty blender that applies makeup quickly, just as well, and without a lot of face slapping.

Five of My Favorite Cheap Drugstore Makeup Products

I think finding great drugstore makeup is more challenging than finding great makeup anywhere else. The aisles are full of bad products, and for a while it was like playing a guessing game to find what would actually work for me. But if a product is good, I’d rather get it for a cheaper price tag at CVS than go to Sephora and drain my bank account. Here are five of my favorite drugstore makeup products!

5fcc6a01-ea9e-448e-ba58-cfa3ad901e4f_1-427e09ab666c690e3590d6cd43aaa5f6
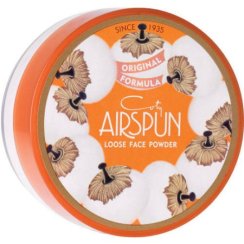
Photo from the Walmart website

Coty Airspun Translucent Extra Coverage Loose Face Powder, $5.97: My favorite drugstore powder, and probably all of our mom’s favorite drugstore powders. It does everything that a translucent powder should do- gets rid of shine, makes your foundation matte, and sets your makeup beautifully.

It’s great for baking your under eye area too if you’re like me and think that using a lot of expensive powder for baking is a bit of a waste.

The only downfall of this is that if you’re photographed it does cause a white flashback. But if it’s for everyday use, it’s a great choice.

url-2.jpg
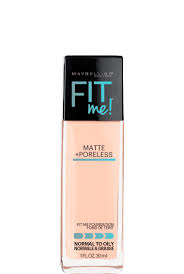
Official photo from the Maybelline website

Maybelline Fit Me! Matte + Poreless Foundation, $5.94: Most drugstore foundations break me out for some reason. Fit Me! is great because it gives a long lasting, high coverage foundation that doesn’t break me out. It comes in 22 different shades, so nearly everybody would be able to find a match for their skin tone.

The only thing about this is that it really isn’t matte, and can get really greasy if you don’t pack on powder to absorb all the oil. I don’t have oily skin and when I wore this for two hours I looked like I had an oil spill on my face. I’d skip the Fit Me! powder and instead pack on some translucent powder to absorb any oiliness that might happen.

url-1.jpg
Official photo from the Maybelline website

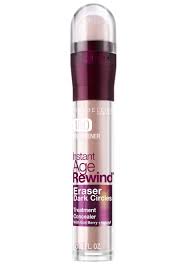
Maybelline Instant Age Rewind Concealer, $7.94: This is my favorite thing on the list. I don’t use any other under eye concealer besides this. I don’t use it to cover any blemishes though, I just use it for the under eye area. I apply it in a downwards triangle underneath my eye, wait a few seconds for it to thicken a bit, and then blend with my fingers. No more dark circles, and no more caked under eye concealer.

url.jpg
Photo from the Walmart website

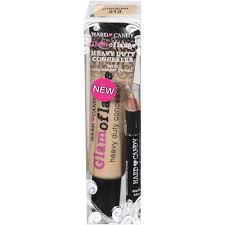
Hard Candy Glamoflauge Heavy Duty Concealer, $6: This concealer can cover everything. Tattoos, under eye circles, blemishes, hyper-pigmentation, you name it. It is long lasting and won’t budge once you put it on. It comes with a little pencil and the concealer. You’re supposed to go over areas that you want covered with the pencil first and then go in with the concealer, but you honestly could just skip the pencil and use the concealer unless you’re trying to cover a tattoo.

Since it is a heavy duty concealer, it can get cakey if you’re not careful. A little goes a very long way. One tube of this lasted a year with constant use.

Maybelline-Mascara-Falsies-Waterproof-Very-Black-041554217988-O.jpg
Official photo from the Maybelline website

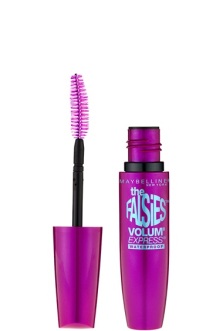
Maybelline New York Volum’ Express The Falsies Waterproof Mascara, $5.94: Gives good lash separation, boost, and darkness. That’s all I really look for in a mascara and it does all of those things. It doesn’t flake off or rub color underneath my eyes throughout the day. It stays on all day and does what it’s supposed to do, so it’s a good mascara to me.